Introduction to Brookies
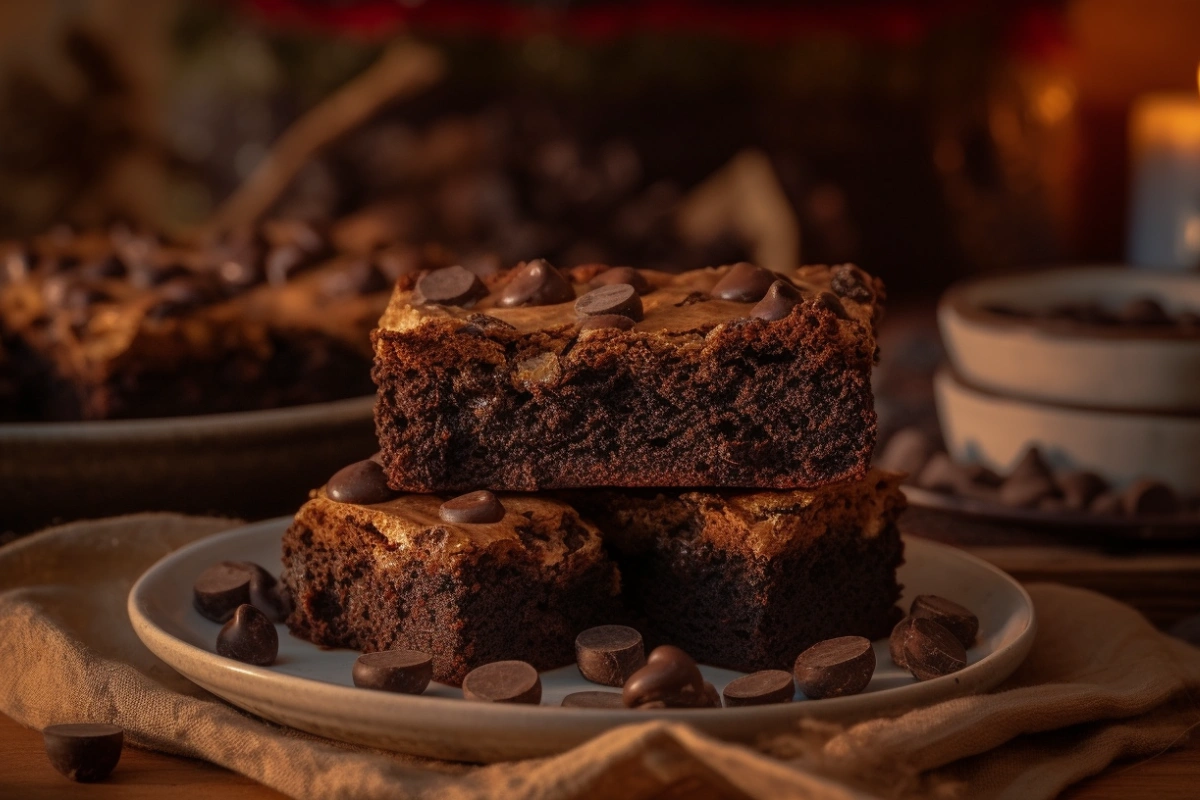
Brookie recipe are the ultimate indulgence for dessert lovers who can’t choose between two classics—brownies and cookies. This delightful treat combines the best of both worlds: the rich, fudgy texture of brownies layered with the soft, chewy goodness of cookies. The result? A dessert that’s as versatile as it is delicious, perfect for satisfying diverse cravings in a single bite.
What Are Brookie?
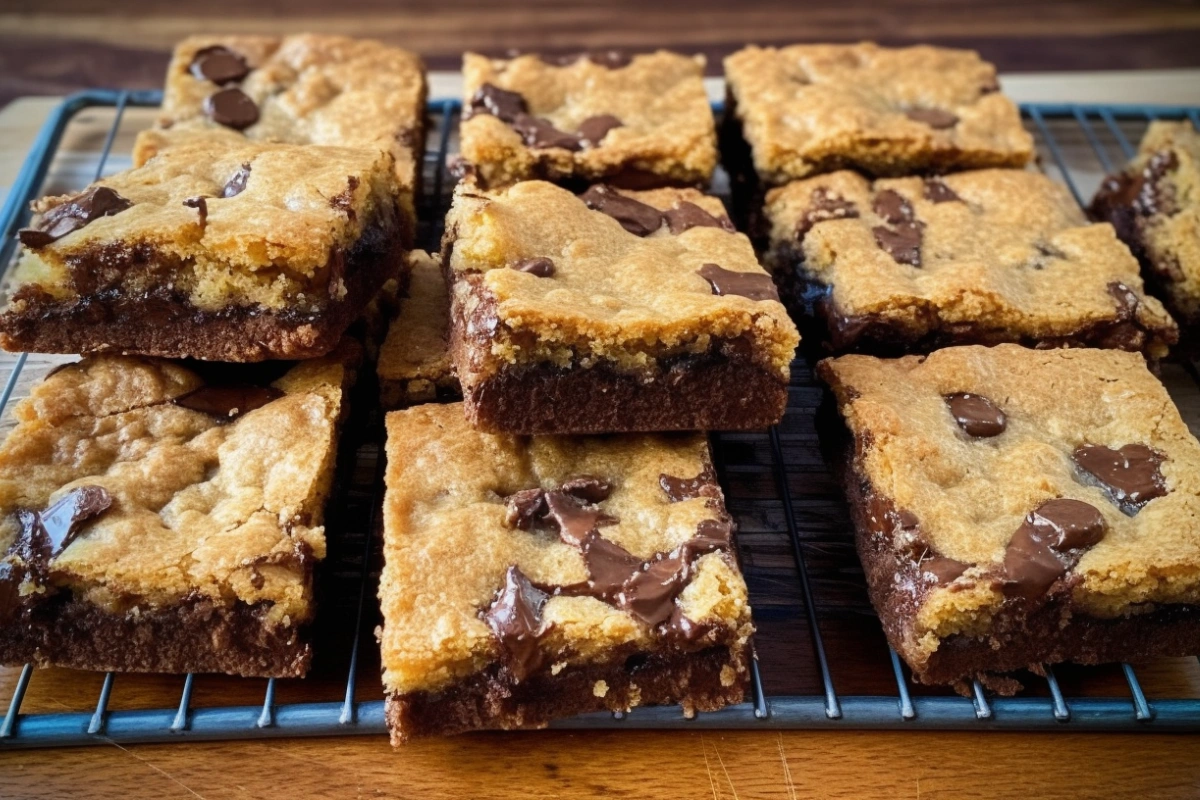
At its core, a brookie is a hybrid dessert, artfully layering two iconic favorites: brownies and cookies. The brownie layer provides a dense, chocolatey base, while the cookie layer adds a contrasting buttery and slightly crisp texture. Together, these layers create a harmonious balance that appeals to every dessert enthusiast.
A Brief History of Brookie
While the exact origin of brookies remains unclear, this creative confection is believed to have been born from a baker’s desire to innovate. Combining leftover brownie batter with cookie dough, the result was a happy accident that quickly gained popularity. Today, brookies are a staple in bakeries, coffee shops, and home kitchens around the world, celebrated for their versatility and decadent taste.
Why Are Brookies So Popular?
- Double the Flavor: With both brownie and cookie components, brookies offer a rich blend of chocolatey decadence and buttery sweetness.
- Textural Delight: The contrast between the fudgy brownie layer and the chewy, slightly crisp cookie layer creates a unique sensory experience.
- Endless Customization: Brookies can be tailored to suit any palate, from adding nuts or chocolate chips to experimenting with flavors like peanut butter or white chocolate.
- Perfect for Sharing: Their compact, square shape makes brookies an ideal treat to share at gatherings, parties, or family events.
Who Loves Brookies?
The short answer: everyone! Brookies are universally adored by kids and adults alike. Whether you’re a chocolate fanatic, a cookie lover, or someone who enjoys innovative desserts, brookies are bound to please. Their popularity spans generations, making them a crowd-pleaser at any occasion.
Brookies in Modern Baking
Brookies have transcended their humble beginnings to become a symbol of creativity in baking. From gourmet bakeries to food influencers on social media, the brookie has been reimagined in countless forms, including gluten-free, vegan, and even keto-friendly versions. The adaptability of brookies ensures they remain a timeless favorite.
Whether you’re a seasoned baker or a beginner in the kitchen, making brookies is an enjoyable and rewarding process. As you experiment with recipes, you’ll quickly discover why this dessert has become a beloved classic in its own right.
Ingredients for Brookies
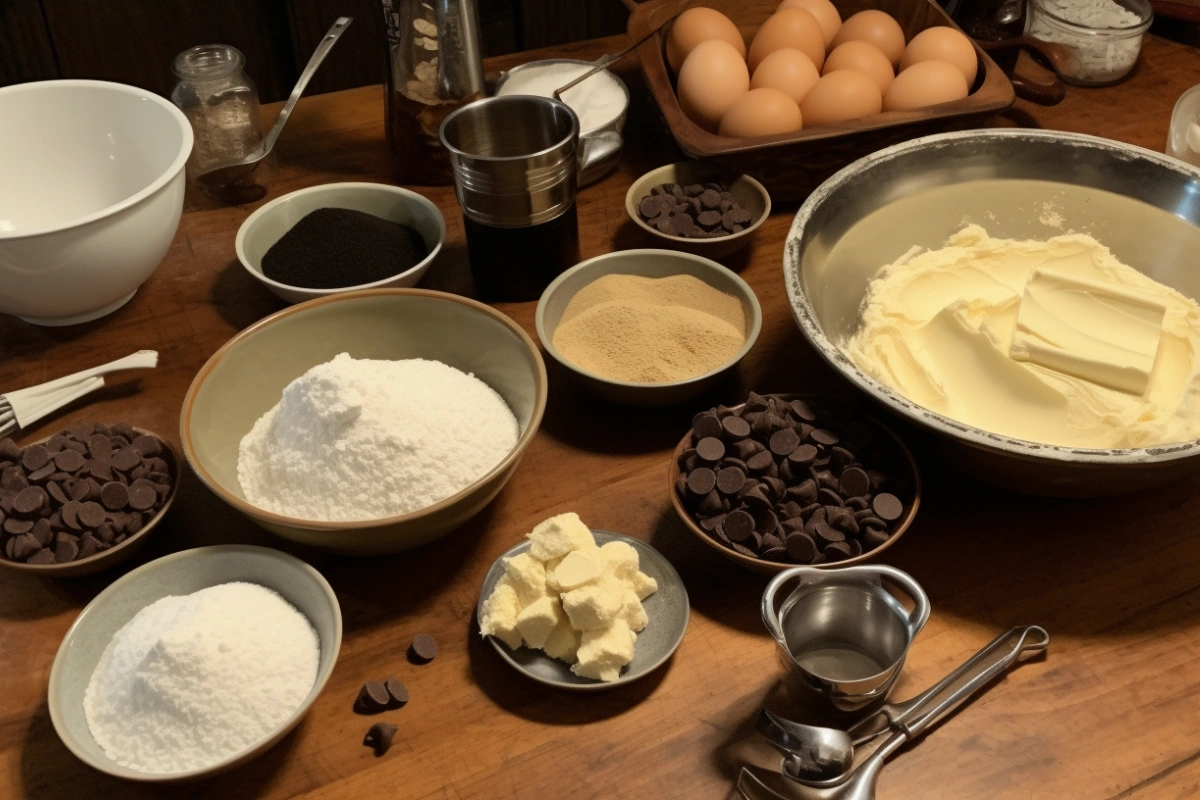
Creating the perfect brookie starts with gathering the right ingredients. The beauty of this hybrid dessert lies in the balance between its two layers—the rich, fudgy brownie base and the chewy, buttery cookie topping. Here’s a comprehensive guide to the ingredients you’ll need for each layer, along with optional add-ins to customize your brookies.
Ingredients for the Cookie Layer
- Butter (½ cup, softened):
Provides a rich, buttery flavor and ensures a soft, chewy texture. Use unsalted butter to control the salt content. - Granulated Sugar (½ cup):
Adds sweetness and helps create a slightly crisp edge. - Brown Sugar (½ cup, packed):
Enhances moisture and imparts a caramel-like depth of flavor. - Egg (1 large):
Acts as a binder to hold the cookie dough together. - Vanilla Extract (1 teaspoon):
Adds a warm, aromatic undertone that complements the cookie flavor. - All-Purpose Flour (1 ¼ cups):
Provides structure to the cookie layer. - Baking Soda (½ teaspoon):
Helps the cookies rise slightly for a soft texture. - Salt (¼ teaspoon):
Balances the sweetness and enhances the overall flavor. - Chocolate Chips (¾ cup):
Optional, but highly recommended for added bursts of chocolate in every bite.
Ingredients for the Brownie Layer
- Butter (½ cup, melted):
The foundation of a rich, fudgy brownie texture. - Cocoa Powder (½ cup, unsweetened):
Creates the deep chocolate flavor that defines the brownie layer. - Granulated Sugar (1 cup):
Adds sweetness and a crackly top layer when baked. - Eggs (2 large):
Provide structure and a glossy, smooth consistency to the batter. - Vanilla Extract (1 teaspoon):
Complements the chocolate flavor beautifully. - All-Purpose Flour (½ cup):
A small amount ensures the brownies remain dense and fudgy. - Salt (¼ teaspoon):
Enhances the chocolate flavor by balancing the sweetness. - Chocolate Chunks or Chips (optional, ½ cup):
For an extra indulgent, gooey texture.
Optional Add-ins and Variations
Brookies are incredibly versatile, allowing for creative twists with these optional ingredients:
- Nuts (chopped walnuts, pecans, or almonds):
Add crunch and a nutty flavor to either layer. - Caramel Swirls:
Drizzle caramel into the brownie batter for a gooey surprise. - Peanut Butter Chips:
A delicious addition to complement the chocolatey layers. - White Chocolate Chunks:
For a sweeter and creamier variation. - Sprinkles:
Great for festive occasions or a fun pop of color.
Ingredient Selection Tips
- High-Quality Cocoa Powder: Opt for natural or Dutch-processed cocoa for a richer flavor.
- Fresh Ingredients: Ensure your baking soda, flour, and other essentials are fresh for the best results.
- Room Temperature Eggs and Butter: These ensure a smooth mix and even baking.
With these ingredients and optional add-ins, you’ll have everything you need to create brookies that are not only delicious but also uniquely tailored to your taste. The next step is combining them with care to form the perfect layers.
Kitchen Tools You’ll Need
Before diving into the process of making brookies, it’s important to ensure you have the right tools at your disposal. Using the proper equipment not only makes preparation easier but also helps you achieve the perfect texture and flavor for your brookies. Here’s a comprehensive list of kitchen tools you’ll need, along with tips on how to choose and use them effectively.
Essential Tools for Preparing Brookies
- Mixing Bowls (at least 2):
- You’ll need separate bowls for the brownie batter and the cookie dough.
- Opt for medium to large-sized bowls to allow for easy mixing without spills.
- Measuring Cups and Spoons:
- Precise measurements are crucial for baking, so ensure you have a complete set for dry and liquid ingredients.
- Look for cups and spoons with clear markings for accuracy.
- Electric Hand Mixer or Stand Mixer:
- A mixer helps cream the butter and sugar for the cookie layer efficiently.
- A stand mixer can be especially helpful for handling dense batters.
- Whisk:
- Ideal for blending wet ingredients like melted butter, cocoa powder, and eggs in the brownie batter.
- Choose a sturdy whisk to handle thicker mixtures.
- Rubber Spatula:
- Perfect for scraping down the sides of bowls to ensure all ingredients are incorporated.
- Use it to gently spread layers without disturbing the texture.
- Baking Pan (8×8 or 9×9-inch):
- A square baking pan is ideal for brookies, as it allows for even layering and baking.
- Choose a non-stick or heavy-duty metal pan for the best results.
- Parchment Paper:
- Line the baking pan with parchment paper for easy removal of brookies.
- Ensure the paper extends over the sides of the pan to act as handles for lifting.
- Oven Thermometer (optional):
- Ensures your oven is at the correct temperature, which is critical for even baking.
- Especially helpful if your oven has inconsistent heat distribution.
Tools for Baking and Finishing
- Offset Spatula or Spoon:
- Useful for spreading the cookie dough evenly over the brownie batter.
- Toothpick or Cake Tester:
- Use to check the doneness of your brookies. A few moist crumbs on the toothpick indicate they’re ready.
- Cooling Rack:
- Allows the brookies to cool evenly after baking, preventing them from becoming soggy on the bottom.
- A wire rack with small gaps is ideal.
- Sharp Knife:
- Essential for cutting the brookies into clean, even squares.
- A knife with a thin blade works best to avoid crushing the layers.
- Storage Containers:
- Airtight containers are necessary for storing leftover brookies to keep them fresh and moist.
Optional but Helpful Tools
- Silicone Baking Mat:
- If you don’t have parchment paper, a silicone mat is a reusable, non-stick alternative.
- Digital Scale:
- For precision bakers, a scale ensures accurate measurements, particularly for dry ingredients like flour and sugar.
- Cooling Pad or Trivet:
- Protect your countertops from the heat of the pan during cooling.
- Pastry Brush:
- Use for greasing the pan if you’re not using parchment paper.
Tips for Choosing Quality Tools
- Invest in durable, high-quality tools that will last through multiple uses.
- Non-stick and stainless-steel options are excellent choices for ease of cleaning and durability.
- Look for multi-functional tools that can be used for other baking projects.
By having these tools ready before you start, you’ll ensure a smooth, stress-free baking experience. Proper equipment not only simplifies the process but also helps you create brookies that look and taste professional. Now that your kitchen is fully prepped, you’re ready to mix, layer, and bake with confidence!
Cooling and Slicing Tips
Once your brookies are perfectly baked, the process doesn’t end there. Proper cooling and slicing are just as crucial to ensure that your brookies maintain their structure, appearance, and texture. Here’s a detailed guide to help you cool and slice your brookies like a pro.
Why Proper Cooling is Essential
Cooling is a vital step in the baking process because it allows the layers to set. Without adequate cooling, the brownie base may remain too gooey, and the cookie layer might crumble when cut. Here’s how to do it right:
Step-by-Step Cooling Instructions
- Cool in the Pan First:
- Once removed from the oven, let the brookies cool in the baking pan for at least 20–30 minutes.
- This helps them firm up slightly and makes them easier to handle.
- Transfer to a Cooling Rack:
- Carefully lift the brookies out of the pan using the parchment paper overhang.
- Place them on a wire cooling rack to allow air to circulate underneath, which prevents the bottom from becoming soggy.
- Let them cool completely for about 1–2 hours before slicing.
- Speed Up Cooling (Optional):
- If you’re in a hurry, place the brookies in the refrigerator after they’ve cooled slightly in the pan. This can reduce the cooling time to 30–45 minutes.
- Be cautious not to freeze them, as this can alter their texture.
Slicing Brookies Perfectly
Once your brookies are fully cooled, slicing them neatly can elevate their presentation. Follow these tips for clean, even squares:
- Use the Right Knife
- A sharp, thin-bladed knife or a serrated knife works best for cutting brookies.
- Avoid using a dull knife, as it can crush the layers and ruin the appearance.
- Warm the Knife
- Dip the knife blade in hot water and wipe it dry before slicing.
- The warmth helps glide through the layers smoothly, especially if you’ve added chocolate chips or other add-ins.
- Re-warm and clean the knife after every few cuts for best results.
- Measure and Mark
- Use a ruler or the edge of the knife to lightly score the brookies before cutting. This ensures even portions.
- For a standard 8×8-inch pan, aim for 16 squares (4 rows by 4 columns) for medium-sized pieces or 9 squares (3 rows by 3 columns) for larger portions.
- Cut Slowly and Gently
- Apply gentle, steady pressure to avoid tearing the layers.
- Avoid a sawing motion; instead, press the knife straight down for clean edges.
Additional Slicing Tips
- Chill for Precision Cuts:
- If you prefer firmer edges, refrigerate the brookies for 20–30 minutes before slicing. This can be especially helpful for gooey or caramel-filled variations.
- Use a Bench Scraper (Optional):
- A bench scraper is a great alternative to a knife for cutting straight, clean lines in dense desserts like brookies.
- Slice Small for Sharing:
- If serving at a party or gathering, consider cutting smaller, bite-sized pieces to make them easier to handle and serve.
Storing Sliced Brookies
Once sliced, store your brookies properly to maintain their freshness:
- Place them in an airtight container and layer them with parchment paper to prevent sticking.
- Store at room temperature for up to 3 days, or refrigerate for up to 1 week.
- For longer storage, freeze the slices in a freezer-safe bag for up to 3 months.
Avoid Common Mistakes
- Slicing While Warm:
- Cutting brookies too soon can cause them to crumble or stick to the knife. Always wait until they’re fully cooled.
- Using the Wrong Knife:
- Avoid heavy or blunt knives, which can crush the layers instead of slicing cleanly.
- Skipping Parchment Paper:
- Without parchment paper, lifting the brookies out of the pan becomes challenging and can lead to breakage.
Proper cooling and slicing not only enhance the visual appeal of your brookies but also ensure that every piece retains its rich, layered texture. Follow these steps for a flawless finish, and your brookies will look as good as they taste!
Nutritional Information
Understanding the nutritional value of your brookie is essential, whether you’re monitoring your intake or simply curious about the breakdown of this indulgent treat. While brookies are a dessert and meant to be enjoyed in moderation, knowing the key nutritional facts can help you make informed decisions. Here’s a detailed analysis based on a classic brookie recipe.
Estimated Nutritional Breakdown (Per Serving)
For a standard 8×8-inch pan, cut into 16 squares:
- Calories: ~210 kcal
- Protein: ~3 g
- Carbohydrates: ~27 g
- Sugar: ~18 g
- Fiber: ~1 g
- Fat: ~11 g
- Saturated Fat: ~6 g
- Cholesterol: ~40 mg
- Sodium: ~100 mg
Note: These values are approximate and can vary based on ingredient brands, portion sizes, and any customizations.
Key Nutritional Components
- Calories:
- The calorie count comes primarily from the butter, sugar, and chocolate used in both layers. Brookies are calorie-dense, so smaller portions are ideal for mindful indulgence.
- Carbohydrates:
- Most carbohydrates in brookies come from the sugar and flour. Reducing sugar or using whole-grain flour can slightly lower the carb content.
- Fats:
- Butter and chocolate contribute to the total fat content. While these fats provide flavor and texture, they’re also high in saturated fats.
- Protein:
- Eggs and optional add-ins like nuts contribute a small amount of protein, but brookies are not a significant source of this nutrient.
- Sugar:
- A significant portion of the sugar content is due to granulated sugar, brown sugar, and chocolate chips. Consider using dark chocolate or natural sweeteners for a lower-sugar alternative.
- Fiber:
- Fiber content is minimal but can be increased by incorporating ingredients like almond flour, oats, or flaxseeds.
Healthier Ingredient Substitutions
If you’re looking to make your brookies a bit more nutritious without sacrificing taste, here are some easy swaps:
- Flour:
- Substitute all-purpose flour with whole-wheat flour or almond flour for added fiber and nutrients.
- Sugar:
- Replace refined sugar with coconut sugar, honey, or a natural sweetener like monk fruit.
- Butter:
- Use coconut oil or a plant-based butter alternative for a healthier fat source.
- Chocolate:
- Opt for dark chocolate chips (70% cacao or higher) to reduce sugar and add antioxidants.
- Eggs:
- Replace eggs with flax eggs (1 tablespoon flaxseed meal + 2.5 tablespoons water) for a vegan option.
- Add-ins:
- Incorporate nuts, seeds, or dried fruit for a boost of protein, fiber, and healthy fats.
Customizing Nutrition for Special Diets
- Gluten-Free:
- Use a gluten-free flour blend or almond flour to make your brookies gluten-free.
- Vegan:
- Replace butter with coconut oil or a plant-based spread, and use flax eggs or another egg substitute.
- Low-Carb/Keto:
- Replace flour with almond or coconut flour and use a keto-friendly sweetener like erythritol.
How to Calculate Custom Nutritional Information
If you’ve made modifications to the recipe, you can calculate the exact nutritional values using online tools or apps like MyFitnessPal or Cronometer. Simply input the specific ingredients and quantities and divide by the number of servings.
Enjoying Brookie in Moderation
While brookie is a treat, they can be part of a balanced diet when enjoyed in moderation. Pair your brookies with nutrient-rich sides like fresh fruit or a glass of milk to add nutritional value to your dessert.
Remember, the joy of brookies lies not just in their rich, decadent flavor but also in sharing them with others. So savor each bite, knowing you’ve created something special and delicious!
Frequently Asked Questions
Brookies are a delightful dessert, but they can also come with their fair share of questions, especially if you’re new to making them. Here are answers to some of the most common inquiries about brookies, along with tips and solutions to ensure your baking experience is as smooth as possible.
1. What Makes a Good Brookie?
A good brookie strikes the perfect balance between the two layers. The brownie base should be rich, fudgy, and slightly dense, while the cookie layer should be soft and chewy with a hint of crispness at the edges. The layers must complement each other without blending together during baking.
Tip: Avoid overmixing the batters and bake at the correct temperature to maintain distinct textures.
2. What’s the Difference Between a Blondie and a Brookie?
Desserts have a unique ability to bring people together, and when it comes to indulgent treats, blondies and brookies are some of the most loved options. But what exactly distinguishes one from the other? This article will delve deep into the history, ingredients, cooking techniques, and serving ideas for both, helping you master the art of baking these crowd-pleasers.
3. How to make a Bronkie ?
- Preheat your oven to 350°F (175°C) and grease a baking dish.
- Prepare brownie batter by mixing melted butter, sugar, eggs, cocoa powder, flour, and a pinch of salt.
- Separately, make cookie dough by creaming butter, sugar, egg, flour, baking soda, and chocolate chips.
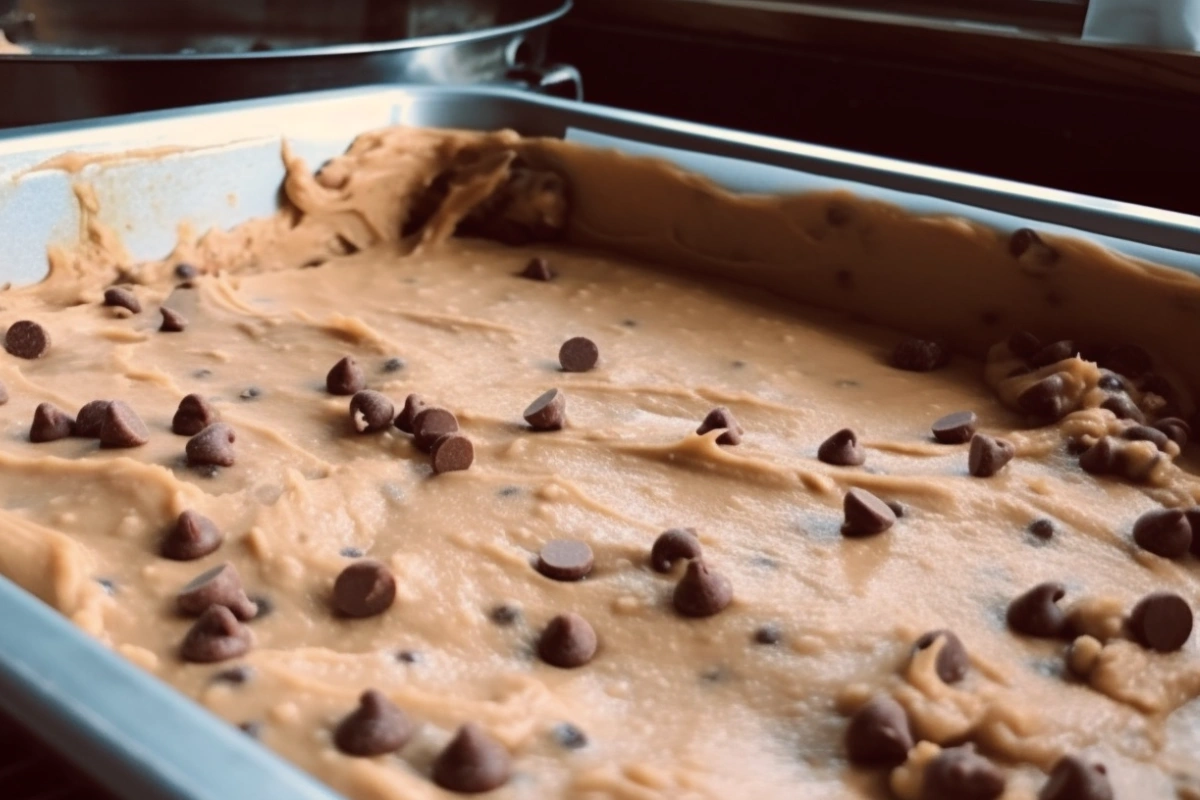
- Spread the brownie batter evenly in the dish, then dollop or layer the cookie dough on top.
- Bake for 25-30 minutes, cool, and enjoy your gooey Bronkie!
4. How to assemble a Brookie ?
- Prepare the cookie dough and brownie batter: Make cookie dough and brownie batter from scratch or use store-bought mixes, keeping each ready in separate bowls.
- Preheat the oven: Set your oven to the temperature specified for brownies, usually around 350°F (175°C).
- Layer the brownie batter: Grease a baking pan and pour the brownie batter evenly to form the base layer.
- Add the cookie dough: Drop spoonfuls of cookie dough on top of the brownie batter, pressing lightly to spread without fully mixing.
- Bake until set: Bake for 20-30 minutes, or until a toothpick inserted into the brownie layer comes out with moist crumbs.
- Cool and serve: Let the brookie cool completely before cutting into squares to serve.
5. Why Are My Brookie Overbaked or Dry?
Overbaked brookie can result from a few common mistakes:
- Baking at too high a temperature.
- Leaving them in the oven for too long.
- Using a pan that’s too large, which spreads the batter too thin.
Solution: Bake at 350°F (175°C) and check for doneness around the 30-minute mark. A toothpick inserted into the center should come out with a few moist crumbs, not completely clean.
6. How Do I Store Brookie?
To keep your brookies fresh and delicious:
- Room Temperature: Store in an airtight container for up to 3 days.
- Refrigerator: Keep them in the fridge for up to 1 week.
- Freezer: Wrap individual slices in plastic wrap and place them in a freezer-safe bag. They’ll stay good for up to 3 months.
Tip: Warm them slightly in the microwave before serving to restore their soft texture.
7. Can I Customize the Recipe?
Absolutely! Brookie is highly versatile, and you can experiment with a variety of flavors and add-ins:
- Add Nuts: Chopped pecans or walnuts for crunch.
- Swirl Caramel or Peanut Butter: For an extra layer of flavor.
- Use Different Chips: White chocolate, dark chocolate, or butterscotch chips.
- Incorporate Sprinkles: For a festive touch.
Tip: Adjust baking time slightly if you add wet ingredients like caramel to prevent sogginess.
8. Why Did My Brookies Turn Out Greasy?
Brookie can become greasy if there’s too much butter or oil in the recipe, or if the batter wasn’t mixed properly. Ensure:
- You’re measuring ingredients accurately.
- Butter is softened, not melted (for the cookie dough).
- You’re mixing just until ingredients are combined—overmixing can separate fats.
9. Can I Make Brookie Gluten-Free or Vegan?
Yes, you can adapt brookie for specific dietary needs:
- Gluten-Free: Use a gluten-free all-purpose flour blend or almond flour.
- Vegan: Replace eggs with flax eggs (1 tbsp flaxseed meal + 2.5 tbsp water per egg) and use a plant-based butter substitute.
Tip: Test small batches first to perfect the texture with alternative ingredients.
10. Do I Need Special Equipment to Make Brookie?
Not at all! You can make brookie with basic kitchen tools like mixing bowls, a whisk, and a baking pan. However, having an electric mixer can make creaming the butter and sugar easier.
11. Can I Double the Recipe?
Yes, you can double the recipe to make a larger batch. Use a 9×13-inch pan and adjust the baking time accordingly—usually 5–10 minutes longer. Keep an eye on the edges and center to ensure even baking.
By addressing these common questions and challenges, you’re now fully equipped to create brookies that turn out perfect every time. With a little practice and creativity, your brookie will be the star of every dessert table!
Conclusion and Final Thoughts
Brookie is more than just a dessert; they’re a creative fusion of two timeless favorites—brownies and cookies. This delectable treat combines the rich, fudgy texture of brownies with the chewy, buttery goodness of cookies, making it a dessert that appeals to virtually everyone. Whether you’re baking for a special occasion, looking for a fun weekend project, or simply indulging your sweet tooth, brookie is an excellent choice.
Key Takeaways
- Versatile and Customizable:
Brookies can be tailored to suit your preferences, whether you want to add nuts, caramel swirls, or even make them gluten-free or vegan. Their adaptability makes them perfect for experimentation. - Simple Yet Rewarding:
Despite their layered appearance, brookies are surprisingly straightforward to prepare. With a bit of patience and the right tools, you can achieve professional-quality results in your home kitchen. - Crowd-Pleasing Delight:
Their unique combination of textures and flavors makes brookies a hit at gatherings, parties, or even as a thoughtful homemade gift.
Encouragement to Get Creative
Don’t be afraid to put your own twist on this classic dessert. Experiment with flavors, try different toppings, or even layer them with a third component, like a cheesecake filling, for a triple-layer masterpiece. The possibilities are endless, and every attempt is an opportunity to create something uniquely yours.
Share Your Creations
One of the best parts of making brookies is sharing them with others. Whether you’re serving them at a family dinner, taking them to a potluck, or gifting them to a friend, brookies are guaranteed to spread joy. Don’t forget to snap a photo of your creations and share them online to inspire fellow bakers!
A Final Word
Brookie is a testament to the creativity and joy of baking. With the tips and techniques outlined in this guide, you’re now well-equipped to bake brookie that is not only delicious but also visually stunning. So roll up your sleeves, preheat your oven, and get ready to enjoy the sweet satisfaction of creating the ultimate hybrid dessert.
Happy baking!


